Smart Home Security
Smart Security Camera Installation: A How-To Guide
Key Takeaways
- Choose the right locations for maximum coverage.
- Understand different wiring options for your cameras.
- Learn how to configure camera software for optimal security.
- Explore the features of various smart cameras available.
Installing smart security cameras is an essential step in securing your home. These devices provide real-time monitoring and alerts, enhancing your overall home security system. In this guide, we will walk you through the installation process, from selecting the right camera to finalizing the setup, ensuring your cameras are positioned and configured for maximum effectiveness.
Choosing the Right Security Camera
Before diving into the installation process, it's crucial to select the appropriate security camera. Consider the features that matter most for your needs. Below is a quick comparison of popular options:
| Camera Model | Resolution | Night Vision | Weatherproof | Special Features |
|---|---|---|---|---|
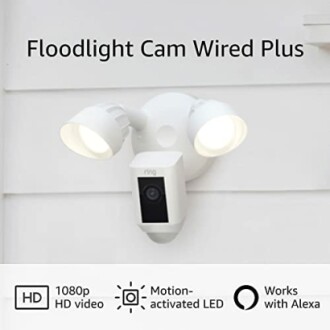
| Ring Floodlight Cam Wired Plus | 1080p HD | Color Night Vision | Yes | Motion-activated notifications, Two-Way Talk |
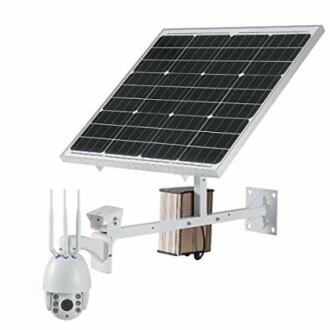
| 4G 1080P HD Solar Wireless Outdoor Camera | 1080p HD | Infrared Night Vision | Yes (IP66) | Remote access, Motion detection alerts |
Steps for Installing Smart Security Cameras
1. Select Locations
When installing security cameras, choosing the right locations is critical for effective monitoring. Here are a few suggestions:
- Entrance points: Front door, backyard door, and garage doors.
- Common areas: Living rooms, dining rooms, and family rooms.
- Outdoor areas: Patios, driveways, and porches.
2. Prepare for Installation
Gather all necessary tools and materials before beginning the installation. You will need:
- Secure camera mounts or brackets
- Drill and drill bits
- Measuring tape
- Level tool
- Wiring tools if you are hardwiring the cameras
3. Wiring Options
You have a couple of wiring options depending on the camera model:
- Wireless: These cameras connect to your home Wi-Fi network, making installation simpler with no need for extensive wiring.
- Wired: Hardwired cameras provide a stable connection but require more installation work. Always use proper electrical measures to ensure safety.
4. Mount the Cameras
Use the mounting brackets to secure the cameras in the chosen locations:
- Use the level tool to ensure the camera is straight.
- Drill holes and install wall anchors if necessary.
- Secure the camera mounting with screws.
5. Setup and Configuration
Once your cameras are installed, it’s time to set them up. Follow the instructions for your specific model:
- Download the companion app for your camera system.
- Create an account and add your device by following in-app instructions.
- Configure settings such as motion alerts, recording schedules, and sharing options.
How to Optimize Camera Settings
To maximize your camera's effectiveness, optimize the settings as needed:
- Adjust motion sensitivity to avoid false alerts.
- Set up zones for where you want the camera to detect motion.
- Regularly check and update your firmware for optimum functionality.
- Watch how the camera responds during peak hours to see if adjustments are necessary.
Recommended Products
Here are two top picks for enhancing your home security with innovation and reliability:
Ring Floodlight Cam Wired Plus
This high-definition camera features customizable motion zones, color night vision, and two-way talk for optimal surveillance and communication.
See Product4G 1080P HD Solar Wireless Outdoor Camera
This weatherproof camera is perfect for outdoor use, with high-definition image quality and automatic night vision for continuous monitoring, day or night.
Explore NowMaintenance Tips for Security Cameras
Keep your security system in good shape with these maintenance tips:
- Regularly clean the camera lenses to avoid dirt or dust buildup that can impact clarity.
- Check camera angles and positioning periodically to ensure optimal performance.
- Test alerts and notification settings to confirm that they are functioning properly.
Tips for Beginners
- Start with a few cameras and expand as needed based on your security needs.
- Utilize the app's support resources for troubleshooting common issues.
- Stay informed about updates and new features for your camera system to enhance functionality.
Conclusion
Installing smart security cameras is a vital step in enhancing your home security. With the right positioning, wiring, and configurations, you’ll be well on your way to creating a safer and more secure environment. Remember to regularly maintain your system and adjust settings as your needs evolve.
For more information on improving your home security, check out our resources on Smart Home Security Systems Overview or learn more about Home Security How-Tos.

